



The Ultimate DIY Guide on How to Tile Floors, Walls & More
Table of Contents
- Tiling Measurement Tips
- DIY Tiling: tools and essentials
- How to tile a wall
- How to tile a floor
- How to tile a staircase
- Common tiling mistakes to avoid
Wondering how to tile correctly to pull off a home DIY project?
You’re in the right place! This ultimate DIY guide is packed with practical advice on how to tile walls, floors, corners and more, helping you achieve your dream interior with minimal hassle.
While the approach to tiling is similar whether you’re revamping a kitchen floor, a bathroom wall or a staircase, there are some subtle yet key differences.
That’s why we’ve compiled all of these tips together, ensuring you’re prepped with all the necessary know-how no matter the size of your project.
Tiling measurement tips
The first step in learning how to tile is mastering accurate measurement calculations.
To work out the area of any living space, you only need one simple sum:
Length x Width = Xm2
This should help you work out how many tiles you’ll need for any given area.
If rooms aren’t a uniform shape, all you have to do is multiply the longest measurements to make sure you have enough tiles to cover the whole area.
DIY Tiling: tools and essentials

Whether you’re laying tiles on floors or walls, here’s everything you’ll need to pull-off the perfect home tiling job:
- Mixing buckets
- Tape measure
- Pencil
- Tile cutter (electric or manual)
- Notched trowel
- Grout float
- Tile spacers
- Tile adhesive
- Tile grout
- Wooden battens & nails (wall tiling only)
- Filler (wall tiling only)
- Levelling screed (floor tiling only)
- Tile backer boards (optional)
- Spirit level
- Primer
How to tile a wall
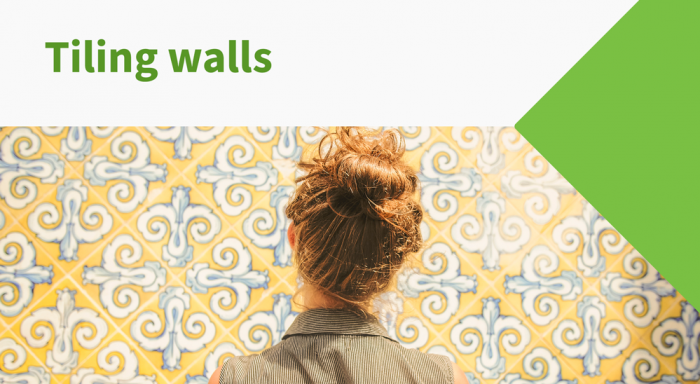
To ensure you know how to tile a wall correctly, we’ve drawn up a step-by-step process to guide you through a successful installation from start to finish.
Tiling walls: preparation
How to prepare a wall for tiling
You can install new tiles on various surfaces, as long as you prepare the wall appropriately.
When proper preparation is done, you can easily apply adhesive and stick your fresh tiles straight onto the wall.
As a rule of thumb, always follow these steps before committing any tiles to the wall:
- Remove old fittings, such as pins, screws, rivets, etc.
- Repair or remove unfit plaster
- Get rid of or pre-treat wallpaper (if present)
- Repair any cracks or signs of damage
- Level the surface
- Sand so that the adhesive can bond
- Make sure the surface is dust, dirt and grease-free
- Choose the appropriate primer for your type of surface
Ensuring a level surface is the most important piece of preparation you can do before tiling a wall.
Tiling an uneven wall has the potential to result in disaster. An easy way to spot irregularities is to place something long and flat (e.g. a regular plank) along the wall, sliding it across. This way, you can identify any swollen areas or bumps, should they exist.
An uneven wall can prevent adhesive from sticking, which could cause your entire wall installation to collapse. According to professional tilers, anything between 3mm and 6mm is still workable, but anything beyond that is likely to cause trouble.
If you decide to apply a slightly thicker layer of adhesive to compensate, its grip might loosen, leading to unwanted issues further down the line.
Tile board backers are a great solution to handling uneven surfaces with minimal effort – just make sure they’re sturdy and well-mounted.
The prep stage is a good time to ensure you have the right type of adhesive, too. For example, when tiling kitchen splashbacks, wet rooms or bathrooms, remember that adhesive must be water-resistant.
According to the professional tradesmen from Fantastic Tilers, less experienced DIY enthusiasts can use the ready-mix type of adhesive, but a professional tiler will always apply the powdered solution.
Powdered adhesive dries slower, allowing you to better adjust and align your tiles.
How do I prep fresh drywall for tiling?
Fresh drywall needs up to a month before it’s ready for tiling but, when the time comes, you won’t have to tape the joints.
All you’ll need to do is apply a skim coat and sand. Once done, clean the surface from dust, dry any signs of moisture and apply the adhesive.
Important: For areas rich with moisture, use water-resistant plasterboard.
How do I prep old drywall for tiling?
It’s crucial to properly assess whether the wall is strong and stable enough to hold the weight of new wall tiles. If you’re unsure, you should always ask for advice from an experienced tiler.
Fill in any cracks or holes from pins, nails or any other type of wall fitting, apply the primer, and then leave to dry. Once dried, sand one more time and then apply the adhesive.
How do I prep the wall for tiling if the drywall is already painted or textured?
According to professionals, you should apply PVA or make a DIY primer by adding a bit more water to your adhesive.
After that, there are a few important jobs to take care of:
- Remove depreciated paint
- Repair cracks and holes
- Sand bumps if present
- Wipe the surface
- Make sure there are no signs of oil or grease
Important: Treat the wall with Trisodium Phosphate (TSP). It’s a powerful cleaning agent, stain remover and degreaser – but bear in mind that this should, of course, be kept well away from children.
How do I prep a plywood surface for tiling?
The truth is that plywood is suitable for tiling your floors, but not as practical when it comes to walls.
The material is made of compressed wood mixed with various oils, which means that heat can affect it. If exposed to frequent and dramatic changes in temperature, tiles and grout will likely crack.
How do I prep a wallpapered wall for tiling?
Tiles offer far more longevity and practicality than wallpaper, and the best option is to remove wallpaper wherever possible.
The most efficient and hassle-free way is by exposing the room to steam, but this approach does come with some risks. If you’re treating drywall or engineered wood via steam, the high temperatures and moisture can potentially cause damage that is often beyond simple repair.
Alternatively, you can simply wipe the surface with a wet and warm rag. This way, moisture won’t penetrate through to the substrate itself but, at the same time, the wallpaper will loosen up.
Repeat the procedure a few times and use a scraper to peel with minimal effort.
Once done, all you’ll need to do prior to applying primer or adhesive is make sure the surface is dry and clean.
Tiling walls: how to lay wall tiles
With your walls prepped, you’re ready to begin laying your wall tiles.
Here’s how to tile a wall correctly:
- Scoop your tile adhesive using a trowel and press onto the wall, starting from your middle point.
- Lay your tile by pressing it firmly against the adhesive.
- Work along the bottom row and work upwards, trying not to work on more than one square metre at a time. This will prevent the adhesive from hardening before you’ve put all the tiles in place.
- Place tile spacers into the corners between the tiles, adjusting the positions of your tiles to suit your design preferences.
- With your tiles firmly attached, allow the adhesive to dry before applying grout.
How to tile corners
Tiling the corners of walls can be difficult and typically requires a little more know-how.
The approach varies depending on whether you’re tiling an internal or external corner:
How to tile an internal corner
- Hold a tile over the corner and place another against the wall, marking the overlap with a pen. Alternatively, you can take separate measurements at the top and bottom of the space.
- Cut your tile to fit.
- Ensure the cut tile fits properly, adjusting the cut if needed.
- Apply adhesive to the back of the cut tile with the narrow end of a notched trowel.
- Press the tile against the corner, using spacers to keep a gap if needed.
How to tile an external corner
- Cut a corner trim to length.
- Apply a strip of adhesive to the return wall and press.
- Align the cut corner trim with the tiles of the adjacent wall.
- Apply more adhesive to the return wall with a notched trowel, working vertically.
- Repeat, working away from the corner trim and remembering to leave space for grout. Use spacers here if needed.
- Confirm the trim hasn’t moved, readjusting if needed.
How much adhesive do I need for wall tiling?
The amount of adhesive you’ll require when tiling your walls will depend on the type of adhesive you use – you’ll usually find the approximate coverage of your adhesive on its packaging.
We always recommend adding an extra 10% to the total amount of adhesive needed – this will account for any inevitable spillages and mishaps.
Tiling walls: finishing the job
There are two key elements to finishing a wall tiling job: grouting and cleaning.
Grouting will fully seal your tiles from moisture, giving you a sleek and professional finish.
Never start grouting until you’re fully confident that the adhesive has set. Distribute your grout evenly by carefully spreading throughout the joints of your tiles using a grout float.
Once set, there may be some grout haze residue or hardened grout that needs to be cleaned off your tiles. Grout haze can be easily removed using a damp sponge, scrubbing in a single direction rather than back and forth or a circular motion.
You can also purchase grout haze remover if the wet sponge approach doesn’t quite do the trick.
Hardened grout can be effortlessly removed using a sponge and homemade solution. Stir white sugar into some warm water, then sponge the mixture into the hardened grout. Leave for an hour, then simply scrape away the remains.
You can use these aftercare tips throughout the lifespan of your tiles to preserve a pristine finish. Grout can be a magnet for dirt, mould and mildew, so staying on top of maintenance is always a good idea.
How to tile a floor
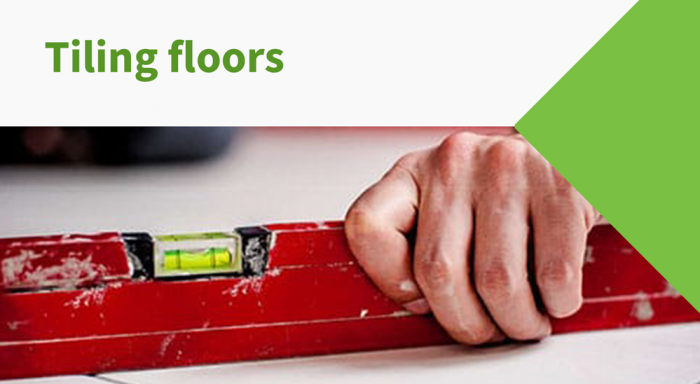
Here’s how to tile a floor with accuracy, ensuring a pristine and professional finish.
Tiling floors: preparation
While the exact preparations you need to take will be determined by the unique demands of your project, as a rule of thumb, look to follow these simple steps:
Step 1: Prep the subfloor
Preparing the subfloor is vital to tiling a floor successfully.
If your subfloor is wooden, first remove any staples and drill/hammer any screws or nails that are sticking out. Then, install a cement backer board to serve as a robust base for your flooring – this can be screwed down to a wood subfloor using backer board screws, mortared down with adhesive.
Alternatively, if your subfloor is concrete, remove any old adhesive and patch/fill any cracks, as well as clearing any loose debris using a floor scraper.
Step 2: Determine your starting point
Measure your floor space to establish the centre, marking with a pen or chalk to guide your installation.
This ‘datum line’ or central point guarantees tiles are laid symmetrically – from here, you will work outwards towards each corner, one at a time.
Remember to leave equal space at either side to ensure you can use even cuts. Your aim should be to place as many full tiles as possible in your design pattern, leaving the custom cuts to accommodate furniture, features and the outer areas of your floor space.
Step 3: Do a dry run
Even if you’re working to a straightforward pattern, it’s always a good idea to dry lay floor tiles before applying adhesive.
This will give you a better idea of what the finished floor will look like and give you the chance to adjust your central point if necessary.
Tiling floors: laying floor tiles
This step-by-step guide on how to lay floor tiles in bathrooms, kitchens or any other area will leave you with a smooth, durable and professional-looking finish, whatever your interior style.
- Mix your adhesive – here, you have two options. If you’re using a small amount of adhesive, you can use a bucket trowel but, for a more efficient approach to bigger jobs, use an electric mixer.
- Keep mixing until you have the right consistency. Ideally, your adhesive shouldn’t be too runny – it should hang off the trowel for a few seconds before dripping off.
- Apply the adhesive to your floor with a bucket trowel. Apply two or three times until you have a medium-sized pile.
- Spread the adhesive evenly across the surface.
- Holding your trowel at a 45-degree angle, push into the floor at a constant angle to form the ribs. Drag towards you, pressing the trowel’s edge firmly into the surface.
- Pat down the adhesive, trying to stay within the confines of 1 sqm to prevent the adhesive from setting too early.
- If laying large format or natural stone tiles, it’s best to ‘back-butter’ your tiles. Apply a thin layer of adhesive to the back of the tile (as well as the floor surface) to strengthen the bond.
- Fix your tile by placing it over the centre mark. Apply a small but firm amount of pressure, jiggling softly to ensure it’s properly in place.
- Ensure the tile is laid evenly both side-to-side and top-to-bottom by measuring with a spirit level.
- Repeat the process with the next tile, using spacers to reserve a gap for grouting.
Tiling floors: finishing the job
Grouting is an essential final step in any floor tiling project.
Applying grout between the tile joints will seal them and prevent movement. Once the tiles are fully dry, use a grout float to smooth the grout over the tiled surface, pressing it into the joints.
As you work, wipe away excess grout with a damp cloth before leaving it to harden. Once the grout has set, wipe the surface with a damp cloth to remove any grout residue, then seal the edges of the room with a silicone sealant.
How to tile a staircase
Tiling can be a daunting task at the best of times, but tiling your staircase can be even more difficult than wall or flooring installations.
These step-by-step instructions for successfully tiling your staircase should put you at ease by making this difficult DIY project a hassle-free experience:
Step 1: Measure
To avoid the dreaded scenario of running out of tiles before the job’s done, start by measuring your staircase dimensions.
First, measure the width and length of your stairs, remembering to incorporate any vertical risers into your relevant measurements. Multiply these two together and you’ll get your square metre space, helping you accurately work out how many tiles you’ll need. Worried about crunching the numbers? Not to worry – our handy tile calculator found on each product page will do all the hard work for you!
If you have irregularly shaped stairs, then it’s best to divide areas up in a logical manner to make this area easier to measure. As with any tiling job, we suggest adding an extra 10% to your final calculations to accommodate any breakages, cuts or unavoidable wastage.
Step 2: Prep
The first bit of preparation needed when tiling a staircase is ensuring your surface is even. This is vital, as tiles installed on uneven surfaces are far more likely to crack, especially in areas of heavy footfall like stairs.
Use a spirit level to get this right. If you find any alterations are required, use mortar and a trowel to smooth out any irregularities and prime your surface for tiles.
If your staircase is made of wood, we’d also recommend using some prep time to add backer boards to each stair, taping each joint and then tiling over the board. This is because wood can expand over time, meaning grout is more likely to crack if tiles are placed directly on top of natural wood.
Step 3: Apply adhesive
Before applying the adhesive, first, add a few droplets of water using a wet sponge to bond the tile adhesive to your staircase flooring. Be sure not to overload the surface with water, though, as this may prevent the adhesive from sticking.
With the right amount of water added, you can begin the application process. Using the flat edge of a notched trowel to apply a layer of adhesive to the floor first, create a semi-circle to help ensure an even and consistent layer. Make sure to cover a wider space than the tile itself, as this allows for any misjudgments to be corrected – we recommend approximately 2 inches.
Once you’ve applied an even layer, you can start to use the comb side of your trowel, helping to ensure the adhesive is even while better bonding it to the tile.
Step 4: Lay your tiles
Before cutting and laying your tiles, it goes without saying that you need to ensure you’ve picked the right type for the job at hand. We recommend opting for porcelain floor tiles. Available in a whole variety of styles, colours and designs, porcelain tiles are non-slip, require minimal maintenance and are incredibly durable – making them the perfect fit for staircases of all shapes and sizes.
For ease and speed, do your tile cuts before you start fixing your tiles down, as the adhesive can set quickly. The easiest way to get accurate cuts is to use a tile cutter that will give you nice, clean edges.
Working outwards from the centre of the rise, you can now begin to lay your tiles, making sure to not press down so hard that the adhesive seeps out of the sides.
Use a spirit level to ensure the tiles are straight and even. In instances where they aren’t level, you can use a rubber hammer, tapping the tile gently to ensure an even surface throughout. Avoid hitting the tiles too hard, though, as this can cause damage and even crack the tile.
Tiling your step edges is going to take extra focus and consideration. When looking to tile a step edge, you have two options. You can either use the top of the step to overlap your riser tile or use a rounded tile trim to add strength to the stairs and provide added support to the tile.
Don’t forget to remove the excess adhesive from around the tile edges, as well as using a damp cloth to remove any adhesive that may have found its way onto the tile surface.
Step 5: Apply grout
When the adhesive is dry and all tiles are securely in place, you can now apply grout between your stair tiles – this will help to seal them and prevent any movement.
Using a grout float to smooth the grout over, ensure you’ve firmly pressed it into each joint. Once this grout has set, wipe the surface with a damp cloth, making sure you’ve removed any unwanted excess.
Allow 24 hours for the grout, adhesive and tile surface to fully set on your staircase, and finish with a final wash to prevent any polymers from being left within the grout.
Common tiling mistakes to avoid
If you want to make sure you’re left with a tiled haven rather than a tiling headache, it pays to know the common tiling mistakes.
Here are some common mishaps that can compromise the success of your home tiling project – don’t let these be your downfall.
Not preparing the surface
Like most things, good preparation is the key to doing a job well – and this definitely applies to installing tiles.
Whether you’re tiling walls or floors, failing to prepare the surface before you begin tiling is one of the most common pitfalls and is guaranteed to leave you with a less than satisfactory finish.
Luckily for you, you can learn how to prep for any wall or floor tiling project above.
When installing tiles, surfaces should be level and clean. This means spending time filling in any cracks or dents or sanding down any bumps that are bigger than 4-5mm.
If the surface is particularly uneven, you can apply a new top surface such as plasterboard for walls or a self-levelling screed to floors. You should also remove any protruding features such as screws or nails.
In terms of cleaning, wipe up any grease, oil or other liquids and sweep (or vacuum) up loose dust and debris. If you skip the cleaning groundwork, you could affect the performance of your tile adhesive in the long run.
Depending on the surface you’re tiling onto, you may need to do additional preparation with primer solutions to ensure your adhesive fully takes to the surface:
- For freshly plastered drywall, allow the surface to dry for at least 4 weeks, then apply a primer solution
- For wooden surfaces, you should use a polyurethane-based paint to prime the area
- For tiling existing tiled areas, you can either remove the tiles then re-skim the surface or simply tile directly onto them – but you should check with your tiler or tile supplier to see if a special acrylic adhesive is required
Using the wrong adhesives
It’s a common misconception that any adhesive will do when you’re installing tiles.
Using the wrong adhesive can impact the longevity and integrity of a tiled area. This means it pays to get the right adhesive from the off, as rectifying your mistakes can be costly and laborious.
So, how do you know which tile adhesive is right for you? Well, it depends on where you’re tiling and the type of tile material you’re using:
- Waterproof adhesives: for bathrooms, kitchens and outdoor areas where tiles will be in direct contact with water, you’ll need a waterproof adhesive. Specifically designed to handle exposure to moisture, this is the ideal choice for tiling sink splashbacks, showers, bathtubs and open outdoor areas
- Flexible adhesives: if you’re tiling onto a backboard or surface that may experience movement over time (like a wooden floor), you’ll need a flexible adhesive that won’t crack if movement occurs
- Rapid-set adhesives: specially designed to offer excellent slip resistance, rapid-set adhesive is the premium choice if you’re installing natural stone or large format tiles. With a quick-setting formula, it firmly holds heavy stone or large tiles in place. Many rapid-set adhesives also come with flexible or waterproof properties for use in different areas
- Heat-resistant adhesives: when it comes to tiling fireplaces or recesses behind wood-burning stoves, you should use a heat-resistant adhesive designed to withstand high temperatures without cracking
- Ready-mix adhesives: using a ready-mixed adhesive can be a convenient and time-saving option for novice tilers, but this should only be used for applying ceramic wall tiles. If you’re applying ceramic tiles in wet areas, you’ll need to make sure you get a waterproof ready-mix adhesive
‘Dotting and dabbing’ adhesive
This refers to a technique for applying adhesive in dots and dabs onto the backside of the tile, either in the centre or the corners.
Using this method is a sure-fire way to make your tiles come loose over time, meaning you’ll be left with a shoddy finish.
The gaps behind the tile can cause moisture to get in, wreaking havoc on the surface behind and ultimately resulting in tiles popping off.
While you may think it’s saving you time and money using less adhesive, it will definitely cost you more to repair moisture damage and replace the tiles further down the line, so it’s a tiling mistake to be avoided at all costs.
Instead, tile adhesive should be applied evenly to the surface (also known as the substrate).
Use a notched trowel to create suction grooves that will hold the entire tile in place and remove any gaps between the tile and surface, preventing water from seeping in. This approach can also make it easier to achieve a smooth, level finish when laying your tiles.
Not ordering enough tiles
With any DIY project, it can be difficult to calculate exactly how much of your various materials and equipment you’ll need.
But not ordering enough tiles is nothing short of a nightmare – it’ll cost you more in both time and labour to get the job done, and tile colours and designs can vary batch to batch.
The main reasons for a tile shortfall are inaccurate measurements and not allowing extra tiles for breakages, cuts or other unforeseen mishaps along the way.
To overcome this, the first place to start is to nail down the measurements of your area and calculate how many square metres you need. You can find the calculation for this at the start of this guide.
Remember: you should always order at least 10% extra to allow for cuts and breakages. You may end up with some tiles left over, but they’re always handy to have as replacements and could potentially be used for another DIY project elsewhere.
Not using battens and markers
No matter how good an eye you have (or think you have), don’t make the mistake of laying tiles without using markers or battens to get straight lines.
It’s very rare for walls or floors to be perfectly straight. Using your eye or an existing feature like a skirting board as your guide could mean you end up with wonky tiles and a less than professional end result.
This is why you should always put your trust in a spirit level to give you a true straight line. For walls, attach a thin strip of timber and mark the centre. This will be your starting point to tile in rows out to each edge, ensuring they’re perfectly lined up both vertically and horizontally.
For floors, you should always tile from the centre of the room out to the corners. Remember to tile the doorway area last so you can exit the room without stepping onto tiles that may not have fully set.
To determine where to start tiling a floor, you’ll need to find your central point by measuring the room’s width and length and marking where the lines cross over. You can then use chalk to mark out the true centre line of the room, using this as your starting point for installing tiles in straight, even rows.
Picking the wrong size tiles
Nowadays, tiles come in a vast range of sizes from 5cm x 20cm metro brick tiles up to 61cm x 120cm large format options.
While this means possibilities galore for your interior design, a common mistake is picking the wrong size tile. This can have a drastic impact on the overall finish and functionality of a space.
It’s easy to get your heart set on a particular design or decor style you like, but don’t let this overshadow the practical aspects of the finished result.
For example, many people choose small tiles for small areas thinking they’ll be easier to install. This may well be the case, but small tiles mean more grout lines that can make an already small room seem even smaller. Instead, larger tiles could be the better choice to create the illusion of a larger space.
This isn’t to say large format tiles are the answer to everything. While they’re a popular choice, they may not be the best option in every setting. If you’re tiling a shower floor or wet room, for instance, a larger tile can make it more difficult to get the right water fall, meaning you’re left with excess surface water.
If in doubt, ask for advice from your tile supplier or tiler to make sure you pick the perfect tile for the area you’re working with.
Not planning the layout
Another common tiling mistake is not planning the layout or pattern of the tiles before attaching them to the wall or floor.
It may seem like extra work to lay out your design mockup beforehand, but it’s definitely worthwhile. For one, it will help you calculate how many tile cuts are needed (and whether you’ve ordered enough to offset these), and will also confirm you have the right size tiles for the area.
Don’t let poor planning be your downfall. Take the time to lay out your designs before you apply any adhesive to make sure you’re happy with how it will look. This also gives you the opportunity to play around with the design or pattern before they’re permanently fixed to the wall.
If you want to know more about how to pick out and plan the right tile layout and pattern for your home, you’ll find plenty of helpful advice right here.
Grouting too quickly
It’s understandable that, once you start a tiling job, you’ll want to get it done as quickly and efficiently as possible.
But don’t make the mistake of rushing the final stage of grouting.
Grout is used to seal the gap between each tile to prevent moisture and dirt from getting in, so it pays to do this job right to give your tile work the greatest durability possible.
Being hasty with grouting can mean you don’t allow enough time for the adhesive to set, causing movement in the tiles and an uneven finish. But there’s also the issue of applying the grout too quickly, which can create voids between tiles, meaning they won’t be fully sealed and protected.
Instead, take your time with grouting, using a grout float to slowly apply and smooth the solution into each and every tile joint. Allow the grout to dry for at least 3 hours before cleaning the tiles – wiping away grout residue when it’s still wet can result in the grout being removed, which will mean you’ll need to reapply it.
With this essential guide on how to tile floors, walls and more, you’ll be prepped and ready to take on tiling jobs big and small in every room of your home.
Take all the time you need to familiarise yourself with these tools, practices and applications before committing to the job at hand. A little extra time spent learning the craft is well worth saving on the hassle and cost of fixing errors.
Of course, you’ll also need to stock up on all the right materials. From our extensive collection of wall and floor tiles to our handy range of tiling tools and accessories, shop with Tiles Direct for a practical and stylish solution every time.

Comments are closed here.