




Home Improvement: Ideas, Tips & Considerations Before Your Project Begins
Table of Contents
Whether you’ve undertaken home renovations before or are contemplating updating your home for the very first time, we’re here to help.
This home improvements guide will walk you through some top ideas, tips and important considerations you need to know, ensuring your interior refreshes are a success.
However, before you start getting stuck into the nitty-gritty details, there are some fundamental aspects you need to nail down first. From budgets and timeframes to practical logistics and interior design themes, even renovating small areas of your home can be costly and disruptive. So, it’s important to go in with your eyes well and truly open. This is where our home improvements guide comes in handy.
We’ll run through all the key elements involved in pulling off a successful home update room by room, including tips on budgeting, practical factors and more. So, let’s get started…
The kitchen
As the heart of most modern homes, it’s little surprise that kitchens are often top of the list when it comes to home improvements.
However, remodelling your kitchen doesn’t come cheap or without disruption, particularly if you’re looking to do a complete overhaul. With this in mind, let’s take a look at what you could expect to spend on a kitchen update.
How much does a kitchen remodel cost?
When it comes to the question ‘how much does a kitchen remodel cost?”, the 2020 UK Houzz & Home Renovation Trend Study cites the average spend on kitchens in the UK at around £10,000. This is likely to be based on a complete kitchen refit, so this price will naturally be lower if you’re only intending on updating a few integral elements such as worktops or tiles.
That’s not to say a full kitchen remodel will cost that much though, as there are a number of factors that can reduce or increase the cost.
For one, kitchen size will dramatically impact the cost of your kitchen interior design. The smaller the kitchen, the fewer materials and furnishings required – and vice versa.
Other considerations that can affect the cost of kitchen remodels include your chosen style of kitchen, building materials, appliances, and other desired specs, not to mention labour and any additional structural work that may be required within your design.
How to keep costs down when updating your kitchen
There are ways you can keep the costs down while still ensuring your dream kitchen interior design ideas come to life:
- Buy off-the-shelf: these can be simple compromises like choosing budget-friendly off-the-shelf kitchen units from the likes of Ikea. Typically, these pieces are well made and built to last, yet still offer enough customisation to suit your needs at a far more affordable price point.
- Shop around for deals: if you’re in serious need of cost-cutting with your kitchen update, you’ll also need to be prepared to shop around to get the best deals. Shop the sales online for cheap kitchen tiles or end of production worktops to get high-quality materials at a fraction of the cost.
- Ask for trade discounts: if you’re looking to enlist the skills of tradespeople, it may be worth asking what trade discounts they are able to offer you when it comes to buying materials. This can often leave you with less choice on styles though, so it may not be the route for everyone.
- Do it yourself: you can also save yourself some money if you look to do some or all of the work yourself. If you love DIY and already know how to tile a kitchen floor or fix kitchen cabinets, this could be a brilliant way to reduce some of the overheads. But, if you’re a little clueless when it comes to practical DIY, it could be best left to the professionals.
Using professional tradespeople can pay dividends from both a money and time perspective – they’ll have the necessary skills to get the job done quicker and will better be equipped to deal with any unforeseen mishaps, should they arise.
When choosing your tradespeople, be sure to get a few quotes from reputable workmen before jumping right in. Ask friends and family for recommendations or use sites like Checkatrade or Rated People if you’re not sure where to start.
Whatever updates you’re looking to make to your kitchen, always outline your budget before you start and keep a close check on what you’re spending. Once you’re in the midst of a kitchen renovation it’s easy for little overspends to accumulate into bigger ones, so getting an idea of what you want to spend on labour, materials and the finer details before you start will ensure you come in on budget – or as close to as you can.
Kitchen remodel timelines
When it comes to calculating how long your kitchen renovation will take, a rough gauge is 6-8 weeks for a standard kitchen refit. This timeline typically includes kitchen removal, reparation work and installation. Of course, depending on the work you’re having done, it could take less or more time than that.
To help you get a better handle on how long you can expect a kitchen update to take based on a full remodel, here are some useful indicators:
Planning and design – 1-6 weeks
The length of this stage will vary depending on your kitchen design. For instance, if it’s a like-for-like design, this can be fairly quick, but more complex designs can take longer to finalise.
Ordering materials – 1-4 weeks
This includes kitchen units, worktops, tiles, appliances and any bespoke pieces for your new kitchen. Off-the-shelf products will typically arrive quicker than anything you’re having custom made, so keep that in mind if you’re on a tight schedule.
Demolition and structural changes – 1-2 days up to 2-4 weeks
Ripping out your existing cabinets, tiles and structural elements usually takes a couple of days and will require skip hire for waste materials. If you’re altering or adding any structural features, replastering walls or moving utility supplies, this can take much longer, so allow additional time.
Painting – 1-3 days
Painting your walls, ceilings and any other surfaces requires a couple of days to fully dry before you install any additional design features like cabinets and appliances.
Tiling – 2-4 days
Installing plain tiles on walls and floors can make the job much simpler and quicker, but if you’re using patterned or mosaic tiles, expect the tiling installation to take a little longer. An average sized floor can be tiled by a professional within 1-2 days, while smaller areas like tiled kitchen splashbacks can usually be done in a day (if you use rapid set adhesive and grouting). Note: if you’re installing underfloor heating or using a self-levelling screed on floors, this will take longer, as these need to be installed and set before you tile over them.
Cabinet and worktop installation – 2-4 days
Depending on how big your kitchen is and whether you’re installing the cabinets and worktops yourself, fitting your kitchen units is often a fairly quick process that only takes a few days.
Appliances – 1-2 days
If you’re simply reinstalling your existing appliances, this is a relatively quick job. If you’re installing new appliances or smart kitchen features, however, you should allow extra time for professional installation.
Finishing touches – 4-6 days
An often-overlooked element of kitchen renovations is the finishing touches – adding cupboard and draw handles, new light fixtures, floor trims, cabinet plinths and the likes. These little jobs can soon add up, but allowing the time to get them done before you start using the kitchen will ensure you have a fully finished design.
Practical considerations for kitchen updates
Kitchen updates can be exciting, but they’re also disruptive to your daily life. With the potential to be out of action for weeks, we’d recommend putting plans in place for when your kitchen isn’t habitable.
While many of you may relish the opportunity to splurge out on takeaways every night, your wallet (and probably your waistline) won’t thank you for it. A few days eating your favourite junk food is one thing – a few weeks or more is an entirely different kettle of fish.
One option is to set up a temporary cooking station and kitchen elsewhere in your home. This is typically going to impact other areas of your living space, so if you live in a small home this could be impractical.
Alternatively, if you upgrade your kitchen during the warmer summer months, consider whether you could set up a makeshift outdoor kitchen. To do this, you’d need to ensure you have a suitable water supply and cooking area like a camp stove or barbecue.
If this all sounds too hectic for your liking, you may be best finding another place to stay while the bulk of the work is being carried out. This could be staying with friends and family, booking a nearby Airbnb or maybe even using this opportunity to take a relaxing holiday!
Beyond the disruption, you may also want to consider the impact the weather can have on your home improvement ideas.
While you can carry out a kitchen update at any time of the year, carrying out updates during the colder months can cause more mess and leave the house chilly. This isn’t just uncomfortable to live in, but can also hike up your heating bills.
Instead, having work done during spring, summer or even early autumn when it’s warmer can mean slightly less mess and no worry of cold droughts.
The interference of a kitchen renovation can make choosing a long-lasting, timeless design an appealing prospect. From investing in high-quality materials to choosing the best kitchen wall colours, opting for design elements that will stand the test of time will ensure you won’t need to go through it all again in a few years’ time.
The bathroom
Next up, let’s take a look at bathrooms. As an integral room (or rooms if you have more than one), bathrooms play a key role in the day-to-day functionality of our homes. This often makes them a logical priority for home improvements.
However, upgrading or adding a new bathroom doesn’t just improve your quality of living – it can also deliver a nice boost to the value of your home, according to a survey by Mira Showers.
For instance, an en-suite bathroom or a modernised space can add up to nearly £4000 respectively. On the other hand, properties with a sole bathroom located downstairs or only accessible through the kitchen (common in older, terraced houses) could see property value depreciate.
How much does a bathroom upgrade cost?
A new bathroom can deliver a nice return on your investment. But as one of the more expensive home improvements besides kitchens, you need to know how much it will cost to update your bathroom before you dive in.
So, let’s get into just how much a bathroom update costs. The latest figures suggest that a typical bathroom renovation in the UK will cost £3000 to £6500. For large bathrooms, those with high-end features or spaces requiring a lot of renovation work, you can expect to pay anything from £7000 up to £15,000 for the job.
These figures are likely based on a full bathroom renovation. So, if you’re looking to make smaller updates to your bathroom interiors (like replacing tiles or upgrading a shower unit), you shouldn’t need to spend as much.
Typically, one of the biggest costs for bathroom updates is labour, as most bathroom updates require some element of skilled labour to ensure correct installation from the start.
Prices for tradespeople will vary depending on your location and the scale of the job. Other factors that can affect the cost of your bathroom upgrade include the size of the space, structural removal and renovations, building materials and the all-important bathroom suite, furniture and fixtures.
Cost-cutting home improvement tips for bathrooms
If you’re working to a tight budget, you may want to consider some of the tips below to help keep your spending on track.
- Compare quotes: when it comes to bathroom renovations, it’s recommended to employ professionals for structural work. This ensures plumbing, electrics and other installations are safely fitted. As a rule, compare at least 3 quotes and, if possible, use tradespeople recommended from friends and family or sites like Checkatrade to make sure you get the best possible price
- Shop the sales: if you’re not in a hurry, use discount sales to your advantage and bag yourself some bargain bathroom essentials. From complete bathroom suites to furniture, tiles and accessories, taking your time to hunt out bargains can help you better budget your bathroom update and keep the costs low
- Get stuck in: outside of any skilled labour, bathroom updates can offer plenty of opportunities to get stuck in and do some of the work yourself. From more challenging elements like knowing how to tile a bathroom to painting and decorative touches, identify jobs you could do yourself before you start the project
- Ask for discounts: if you’re buying a lot of materials in bulk, don’t be afraid to ask for a discount. It may seem cheeky, but the old adage “you don’t ask, you don’t get” could help to save you some valuable cash
Bathroom renovation timescales
Asking how long a bathroom update takes can be like asking ‘how long is a piece of string?’. You really can’t give a definitive answer as each project will vary. However, it goes without saying that larger bathrooms or updates that involve a complete bathroom refit will inevitably take longer than a simple refresh.
Major renovations can take up to 6 weeks (depending on the variables above), so to help you figure out a rough timeline, here’s a few pointers on how long key elements of the project can take:
Finalising the design – 1-4 weeks
Bathroom design requires planning, and if you haven’t embarked on one before, we’d suggest allowing at least a week for straightforward cosmetic updates and up to a month for bigger projects.
Collecting building materials – 1-4 weeks
From bathroom suites to tiles and any specialist materials, always allow extra time for deliveries to ensure you have all the pieces you need before you begin. If you don’t, waiting for supplies can cause costly delays, not to mention frustration.
Removal and structural work – 1-2 days up to 2-4 weeks
If you’re undergoing a full bathroom renovation, allow 1-2 days to remove the existing suite and fixtures. Any required structural changes such as replastering, building new stud walls, plumbing and electrical installations will take much longer – anything from 1-4 weeks depending on the level of structural work needed.
Decorating – 1-3 days
When it comes to decorating your bathroom, be that paint or trendy bathroom wallpaper, factor in a few days for prep, decorating and drying time.
Tile installation- 2-4 days
Depending on the size of your bathroom and choice of tiles, it shouldn’t take more than a couple of days to complete. However, if you’re installing underfloor heating or using complicated patterns or mosaics, you may need to account for these aspects.
Bathroom suite installation – 2-4 days
If you’re replacing an existing bathroom suite, you may think it’s a quick process. Often, however, new suites will have different plumbing requirements or positionings that may need extra installation work.
Finer details – 2-6 days
From hanging mirrors and vanity cabinets to cleaning and moving items back in, returning your bathroom to its functional glory once all the major works have been completed can take anything from a couple of days up to a week.
Bathroom renovation practicalities
Like kitchens, a bathroom update can be disruptive to your usual daily routine, so it’s worth having a handle on the various practical considerations before you get started.
For one, how will you wash with your bathroom out of action for a prolonged period of time? If you have a second bathroom, this shouldn’t cause any major issues, but for homes with just one, you’ll need a plan to ensure your personal hygiene doesn’t go down the drain.
Start by asking your tradespeople how long each element should take, factoring in that you may need to juggle things around if you have different professionals in at different times.
Having a clear plan of what’s happening when may mean that you can still use your bathroom (albeit at a very basic level) throughout the renovation. For bigger renovation projects, you may be better seeking an alternative bathing location – this could be at a friend’s house or even a stay in a hotel or Airbnb.
Your decor choices can also help ease the transition from old bathroom to new. As we mentioned above, choosing design elements that are quick and easy to install can shave time off your bathroom update timeline.
Similarly, make sure you pick a bathroom interior design that’s going to stand the test of time. The last thing you want is to have to repeat the process and disruption in a few years’ time.
From choosing the right bathroom colour scheme to investing in hard-wearing, quality building materials and furnishings, take the time to carefully plan out all of these essential design elements. The end result will be a bathroom that’s equipped to last for years with minimal need for extreme updates further down the line.
The hallway
If you’re looking to give your hallway some much-needed attention, we’re here for you.
Seeing their fair share of foot traffic, these functional spaces are often low on the priority list of home improvements. However, without any complicated plumbing or electrical elements involved, giving your hallway a makeover can actually be one of the quicker, more affordable home improvements to undertake.
Whether you just want to make a few aesthetic updates or you’re going all out with a complete do-over, we’ll walk you through the process to ensure your hallway project is a complete success.
How much should a hallway update cost?
The cost of renovating a hallway is definitely one of the less expensive home improvement ideas you could tackle.
That being said, like any home improvement project there are a number of variables that can cause the cost to increase or decrease.
For a simple repainting job, assuming the wall plaster and woodwork are in good condition, you can freshen up the space for just a few hundred pounds (probably even less if you do the work yourself). But remember, the cost will increase considerably if you decide to continue the same decor theme on the stairs and landing.
If you want to take your hallway update a step further with new flooring, this can also increase the overall project cost. Easy-to-install laminate flooring can be one option, but for a flooring solution that delivers exceptional durability and longevity in this busy area of the home, tiles are a smart choice.
To work out the price of tiling your hallway, you’ll need to calculate the cost of the tiles and additional materials like adhesive and tiling tools (as well as the cost of labour if you’re looking to employ a professional tiler for the job).
Tiler rates vary, but based on national averages the cost per square metre should be around £35, although some tilers offer day rates between £120-£200 or they may give you a complete job quote. Be sure to clarify the price before you start.
Where you live can also impact price (costs are generally higher in London and surrounding counties) as well as your choice of tiles. Complex patterned tiles or mosaics can be trickier and more time-consuming to install with awkward cuts around stair treads and corners, so the day rate may be more.
Cost-saving tips for hallway renovations
There are plenty of ways you can minimise the outlay when it comes to spending on your hallway update project, such as:
- Tackling the work yourself: if you know how to tile a hallway yourself or you’re a dab hand with a paintbrush, you can save yourself a chunk of cash on labour. Keep in mind that what you do save in money could cost you more in time, depending on your experience levels
- Going bargain hunting: taking the time to trawl the sales for cheap tiles, furniture and other discounted deals on materials will all go towards saving you money. Just be wary that you’re not sacrificing quality and longevity by buying things cheap
- Getting more than one price: from painting and decorating to tiling, if you’re hiring tradespeople, always get at least 2 (ideally 3) quotes for the work and choose a reputable professional to ensure the job is done well
How long will a hallway renovation project take?
In comparison to bathrooms and kitchens, revamping your hallway shouldn’t take anywhere near as long.
For one, hallways are generally much smaller areas, but they also don’t generally require as much structural work.
The biggest part of a hallway update is likely to be the planning, ensuring your hallway design ideas come to life. For older houses with decades of wallpaper and tired decor, you may need a week or more to get things ready, while newer homes may require far less prep.
To help you figure out a rough idea of timelines, here are a few estimates for the work involved:
Design planning – 1-7 days
Straightforward aesthetic updates like repainting don’t really require a lot of planning, but if you’re stripping things back and starting again with a new floor plan, you may want to allow at least a week to finalise the design.
Acquiring materials – 1-4 weeks
Buying off-the-shelf materials can mean you have your materials like tiles and furniture ready to install in just a few days. But, if you’re ordering bespoke pieces or items that need delivery, avoid delays by factoring in delivery times before you book for the work to be carried out.
Preparation and structural updates – 2-3 days up to 2-3 weeks
If you’re giving your hallways a complete overhaul, you may be investing in re-skimming walls, stripping old wallpaper, new woodwork, additional lighting and more. This will all take longer than just a quick repaint, so give yourself extra time for any demolition or structural changes required.
Installing tiles – 1-3 days
Most average-sized hallways should be able to be tiled and sealed in a day or two, but if you have a large space or are using complicated patterns, this is likely to be more like a few days.
Decorating – 1-3 days
Given the size of the space, painting walls can typically be completed within 1-2 days, including priming and 2 coats. This can be slightly longer if you’re also painting woodwork, doors and stairs.
Furniture and fixtures – 1-4 days
Adding the finishing touches like new light fittings, coat hooks and storage can take anything from a few hours to a few days. To ensure you have a perfect end result, consider the extra time needed to get these finer details nailed down before your hallway is put to full use.
What else to consider with a hallway renovation
While hallway updates are generally quicker than other key areas of the home, as the entrance to your home you can still expect it to cause a certain amount of disruption.
Firstly, if you’re intending on doing a full update with new floors, skimmed wall and everything else that comes with it, you need a robust plan in place for when this area of the home is inaccessible.
This could be using an alternative entrance (if you have one), or you may need to plan updates in stages, ensuring that you can still access areas of the home such as upstairs. This may mean negotiating with tradespeople to carry out work early in the day when the house is less busy, giving things like tile adhesive and plaster time to dry. This could also mean your completion date gets pushed back slightly.
Another consideration is the weather. During the winter months, having the front door open for prolonged periods of time for access and ventilation is a sure-fire way to cool your house down and hike your heating bills up.
In contrast, undertaking a hallway update in the warmer months could mean a fresh, cool breeze running through your home. This can help things to dry quicker, as well as provide better ventilation to eliminate paint fumes – a win-win situation.
Finally, when planning your hallway design, pay close attention to hallway colour schemes to ensure you strike the right balance between style and practicality. For instance, a pale hue for small, narrow hallways can open it up and make it feel brighter, but light colours inevitably make marks more visible.
null
The garden
Finally, let’s take our focus outside the home, looking at the costs, timelines, and other considerations needed to pull off a successful garden design renovation.
For the uninitiated, garden renovations may seem like one of the easier home improvements to undertake. After all, don’t you just need to put a seat here, a few plants there, and you’re all set?
In short, no!
The nuances of garden design projects are actually a lot more complex than they appear, and in many cases, they need a completely different approach to home improvement projects inside your home.
One of the most significant differences is that gardens are living beings, meaning unlike most living spaces, they require continual care and attention to ensure they stay looking their best through every season.
This reality may make you want to give up before you’ve even started, but it’s okay – we’re here to help you start laying the right foundations for a successful home garden design project.
How much does a new garden cost?
Let’s start with cost. The amount of money you have to spend on your garden will understandably impact the type of design. In principle, the more you spend on your update, the grander and more impactful the end result will be.
Checkatrade’s latest figures suggest that the cost of a complete garden renovation in the UK is anything from £5,000 up to £10,000.
These are average guideline figures, so don’t think you can’t still create a beautiful outdoor space on a smaller budget. There are plenty of garden design updates that don’t require a hefty cash injection.
For instance, a quick fence or garden wall paint job won’t set you back a lot of money, but a fresh colour scheme can still make a lasting impact. Similarly, revamping your flower beds in the spring with new border materials or upgrading your outdoor dining set can be a few hundred pounds well spent when you have a smart, new space to enjoy.
A key consideration when calculating the costs is how big your garden design will be. Naturally, any major work like excavating areas, tree removal or construction work is going to eat into your budget considerably, as you’ll need to hire specialist tradespeople to help.
Prices will vary depending on the scale of the job and potentially your location, so always be sure to get a handful of quotes for any big jobs and ask around for recommendations to find reputable tradespeople.
Garden update cost-saving tips
If you’re worried about the expense of your garden update, here are a few ideas on how you can help to keep the costs down without having to make too many compromises on your garden design ideas.
- Divide it into small projects: one of the beauties of garden design is that it’s far easier to divide the space up into smaller projects, allowing you to update in stages and spread the cost out over time
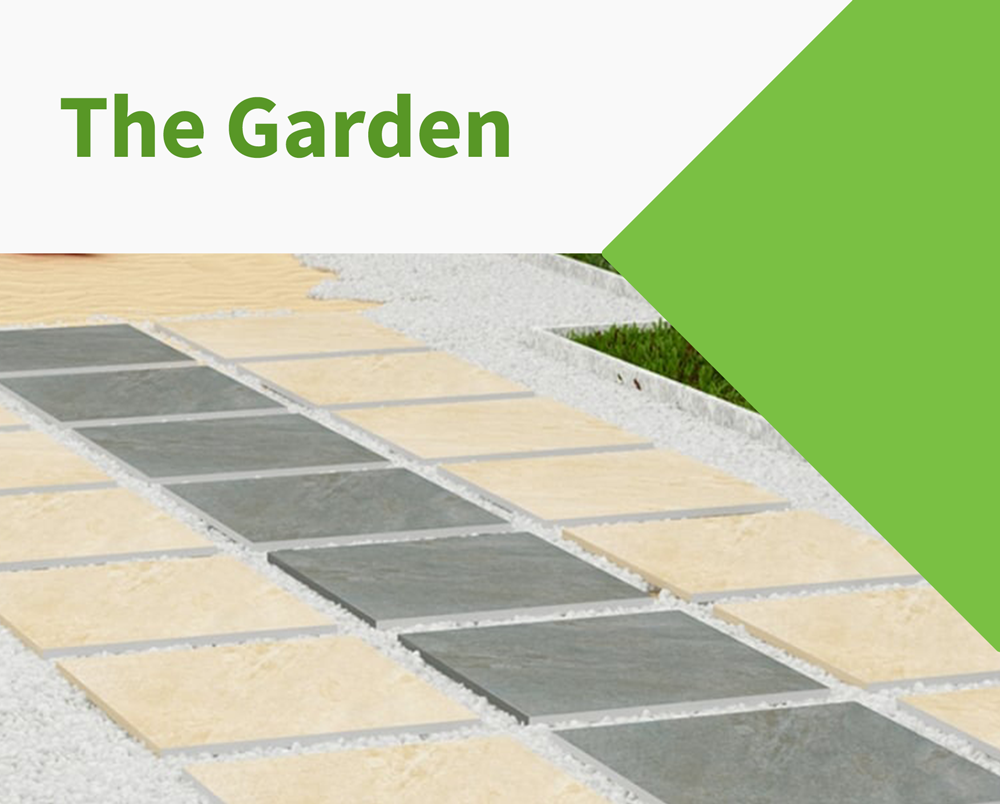
- Do some work yourself: labour can be expensive, so doing some of the work yourself can save you a good chunk of money. For example, learn how to lay outdoor tiles and create a stylish outdoor dining terrace
- Shop out of season: to get garden essentials like furniture and equipment at a lower price, shop out of season in autumn and winter when big-ticket items are on sale
- Test out plants: be conservative with your planting budget by tackling one flower bed at a time, allowing you to test which plants grow well in your garden. This means you don’t waste money buying plants on a whim for your whole garden.
- Be prepared to compromise: if your budget is tight, you may need to make compromises on your design. Where possible, try not to sacrifice quality for cost. For instance, paying more for the best outdoor tiles will give your patio better durability long-term. Buying a cheaper tile that’s not designed for outside installation, on the other hand, is a false economy as they’ll deteriorate quicker and need replacing
Garden design project timelines
The size and scale of your garden design will naturally dictate how long your garden update will take, not to mention whether you intend to do the work yourself (DIY renovations tend to take longer).
There are also factors like the weather to contend with, but here are a few ideas for rough timelines to expect:
Planning stage – 1-4 weeks
Simple garden updates like repainting fences or replanting existing beds don’t really require a lot of planning. However, if you’re undergoing a full re-landscaping project, you should allow at least a few weeks – possibly even more if you’re getting professionals to draft up plans.
Ordering materials – 1-4 weeks
If you’re on a money-saving mission, bargain hunting and buying out of season can mean you have to wait longer for things to arrive. The same applies to any bespoke items, so factor this into your timeline. General garden supplies like landscaping materials shouldn’t take more than a week or two to arrive.
Preparation – 2-3 days up to 2-3 weeks
For small updates like re-tiling a patio or path over existing concrete, you should only need to allow a few days. If your design incorporates any structural prep work like earth excavation, debris removal and such, you should always overestimate these jobs as bad weather could cause delays
Installation – 1-3 days up to 2 weeks
Again, the installation and finishing touches of your garden design can be anything from a couple of days to a couple of weeks, potentially more if you’re doing things in stages. When planning the execution of your designs, don’t be discouraged if they run over – working outside can throw up a lot more unexpected issues.
As we already mentioned, weather can have a big impact on the cost, timeline and the end result of your garden design update, so it’s essential that you don’t underestimate Mother Nature.
When you’re planning your garden design, don’t forget to consider how the weather could affect your project not just from an execution point of view, but once it’s finished, too.
Have a robust plan in place to outline when will be the best time to carry out certain jobs. For example, excavation work, digging and construction tasks are best suited to spring, summer and autumn when the weather is milder and the ground tends to be softer and more pliable.
For planting, pay close attention to the needs of different plant species. Consider the time of year they should be planted (not all plants thrive in spring), the type of growing conditions they need (full sun, partial sun, full shade), the best soil type and any special care needed during particular seasons.
Also factor in whether your garden design requires additional drainage or irrigation systems to regulate the soil.
Taking all these factors into consideration should help your plants and overall garden design thrive in your home regardless of the weather that comes their way.
Final thoughts
Executing a smooth-running home improvement project can be a challenge. It doesn’t matter if you’ve done renovations before or you’re a complete novice, with so many factors to consider (and that’s before work has even begun), you need to have a good grasp of the fundamentals.
Whether you’re undertaking a complete kitchen remodel or a quick bathroom update, always give yourself plenty of time to plan, prepare and execute your upgrades.
With the right foundations in place from the off, you should be in a better position to roll with the punches if you come up against any unforeseen issues – be that shonky plumbing, rotten floorboards or worse.
This home improvement guide is designed to help you do exactly that. Arming you with tips and key considerations, you should have all the right know-how to make sure all your hard work at the beginning pays off with a stunning interior update at the end.
When it comes to choosing tiles for your new kitchen, bathroom, hallway or anywhere else, you’ll find plenty of options in our enormous selection of wall tiles and floor tiles for every room. And if you need any more home improvement tips on styling, installation and more, our blog has it all.

Comments are closed here.